Leaderboard


Popular Content
Showing content with the highest reputation on 02/11/21 in all areas
-
Of course, I'm not saying anything about you, I respect your commitment to helping people. And about the code, I have quite a lot of evidence (Comparing the code straight from the server - my friend was working on some scripts, and it's just the same, but without bugs and backdoors)1 point
-
You are alleging him to make unauthorized use of a gamemode resource? Maybe he does, maybe not. I am not affiliated with this dude in any way and don't want to be involved in any thievery. I have to say that multiple people have come forward with support requests about similar code. I would say that your leak hint is not unfounded. But leave me out of this mess.1 point
-
I don't know if this still works, but I have run two instances of MTA in the past. On Windows, I ran separate MTA instances on separate users. It was inconvenient because I couldn't see both windows at the same time. On Linux, I made another Wine prefix. Separate Wine prefixes work as separate Windows systems and each can run its own instance of GTA SA.1 point
-
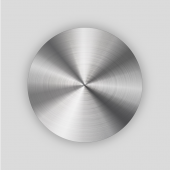
Hello saca, do you know about the dxDrawCircle function? You can use the startAngle and stopAngle parameters to specify the intervals of the pie-chart colors. For example... addEventHandler("onClientRender", root, function() dxDrawCircle(100, 100, 100, 100, 0, 90, tocolor(255, 255, 255, 255)); dxDrawCircle(100, 100, 100, 100, 90, 180, tocolor(255, 0, 0, 255)); dxDrawCircle(100, 100, 100, 100, 180, 270, tocolor(0, 255, 0, 255)); dxDrawCircle(100, 100, 100, 100, 270, 360, tocolor(0, 0, 255, 255)); end ); This method may not create the best-approximated circle due to triangle-based approximation. You can use shaders and custom math using sin/cos to create a smoother circle. Basically, you use the euler distance equation to determine if the point is inside the circle to draw it, and then you use smart quadrant-based inversion of the sinus function to determine the angle of the pixel. Then you can simply look-up the color from shader values to draw for the circle angle intervals. Good luck!1 point
-
Hello Potato_Tomato42, 1) you seem to have trouble understanding the Lua syntax. Here are some (but not all) faulty lines I am referring to: GUI.i = dgsCreate3DInterface (-2631.4, 609, 13.45, 1, 0.5, 200, 100, tocolor(255,255,255,255), 0, 1, 0) ... label.i = dgsCreateLabel (0, 0, 200, 15, getPlayerName (player), false, GUI.i) ... image.i = dgsCreateImage (0, 20, 200, 20, "assets/images/wantedLevel/"..getPlayerWantedLevel (player)..".png", false, GUI.i) I think you want to save UI element handles for each player on your server and store them inside the table. But did you know that the expression "obj.key" is looking-up into "obj" by specifier constant string "i" and not the value of the i variable? I think you want to change the code to... GUI[i] = dgsCreate3DInterface (-2631.4, 609, 13.45, 1, 0.5, 200, 100, tocolor(255,255,255,255), 0, 1, 0) ... and all faulty lines based on the same syntax adjustment. The expression obj[key] does lookup into obj by key variable key. 2) also you are not handling the case when somebody new is joining into your server. This person does also require a nametag but you are just assigning nametags to the players that are joined at the point of resource start, ignoring the case when new players arrive. Please use the onClientPlayerJoin event to assign a new nametag. Hope this helps! ?1 point
-
Try change if getPlayerWantedLevel (player) > 0 then image.i = dgsCreateImage (0, 20, 200, 20, "assets/images/wantedLevel/"..getPlayerWantedLevel (player)..".png", false, GUI.i) table.insert (image, image.i) end into if (getPlayerWantedLevel (player) > 0) and (player ~= localPlayer) then image.i = dgsCreateImage (0, 20, 200, 20, "assets/images/wantedLevel/"..getPlayerWantedLevel (player)..".png", false, GUI.i) table.insert (image, image.i) end1 point
-
،@yoyo2021 مرحباً بك في المنتدى .تم نقل موضوعك للقسم الرئيسي، قسم المساهمات خاص لنشر المساهمات فقط1 point
-
Adding onto the above, you will want to ensure that the virtual machine special detection is disabled if you go down that route (SD #14). https://wiki.multitheftauto.com/wiki/Anti-cheat_guide. VirtualBox is the best free software for this. You will need a Windows .iso file to set this up. Additionally, you will need to re-install GTA SA and MTA. There isn't any specific scripting hack or workaround unfortunately.1 point
-
Para usar o ACL, você tem que cadastrar os usuários no sistema interno de conta do servidor MTA. Tem certeza de que não quer criar seu próprio sistema de direitos em vez de confiar no MTA's? A fim de facilitar a ACL para permissões lógicas personalizadas de jogo recomendo que você crie grupos ACL personalizados com nomes fortes, como a descrição do trabalho "Mecânico". Em seguida, você também precisa de um grupo ACL "DefaultJob" que nega todos os direitos por padrão. Para cada um desses grupos, você deve criar um grupo de direitos ACL usando a função aclCreate com o mesmo nome. Então você pode adicionar pessoas a grupos da ACL, assim... function AceitarEmprego01 (source) exports.Scripts_OnMarkerMsgs_:delete(source) unbindKey ( source, LetraParaMarkers, "down", AceitarEmprego01 ) if getElementData ( source, "AirNew>Encaminhamento" ) == "Mecanico" then local playerAccount = getPlayerAccount(source) if not (isGuestAccount(playerAccount)) then local mec_group = aclGetGroup("Mecanico") local accname = getAccountName(playerAccount) aclGroupAddObject(mec_group, "object." .. accname) --aclSave() end setElementData ( source, "AirNew>Encaminhamento", false ) setElementData ( source, "Emprego", "Mecanico" ) exports.Scripts_Dxmessages:outputDx(source, "Você Agora Trabalha de Mecânico, Para Mais Informações Digite ( /Profissao )", "success") else exports.Scripts_Dxmessages:outputDx(source, "Você Precisa Estar Encaminhado da Agencia de Empregos para Trabalhar neste Local!", "error") end end Em seguida, você pode usar a função hasObjectPermissionTo usando o elemento jogador para verificar se ele pode executar as coisas que ele deve fazer. Isso te ajuda? Se sim, então eu posso ajudá-lo no segundo ponto também.1 point
-
Este é um texto traduzido automaticamente. Recomendo que você use a função engineRequestModel para criar um novo modelo de identificação (veículo, objeto, ped). Em seguida, você pode usar o engineReplaceModel para carregar novos dados de triângulo e engineImportTXD para carregar novos dados de textura nele.1 point
-
Olá, @MTS_LoneWolf! Sim, isso é possível utilizando de timers. (setTimer) A lógica por trás desse exemplo que você deu, seria usar um timer com duas (2) execuções a cada 10 segundos, ou seja, ela iria demorar 20 segundos para executar todo o processo dado como exemplo e, caso estivesse executando pela segunda vez, a função toggleAllControls também iria ser chamada. Exemplo: addCommandHandler("assaltar", function(player) toggleAllControls(player, false) givePlayerMoney(player, 5000) setTimer(function(player) if isElement(player) then -- IMPORTANTE! Aqui checará se o jogador existe, pois ele pode sair do servidor, o timer continuaria executando e geraria um erro no '/debugscript 3'. local _, rTimes = getTimerDetails(sourceTimer) -- Será armazenado na variável 'rTimes' quantas vezes restam para terminar. givePlayerMoney(player, 5000) if rTimes == 0 then -- Caso esteja restando 0, ou seja, nada, então nós voltamos à situação normal do jogador, com todos os controles funcionando. toggleAllControls(player, true) end end end, 10000, 2, player) end)1 point
-
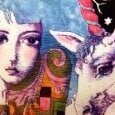
I've always wanted to do this shader but never had enough motivation. It's very simple and works great when images are the same size (that is, texture and mask). This basically is used to mask part of an image (the texture). Scroll down to see an example. I'm not going to release a resource of this because it's just 2 files that you need to add to your resource and as far as I remember you can't export classes from resources. Anyway here is what you need. Create the following 2 files: c_50masker.lua --[[ Author: 50p Version: v1.0 Description: This class allows easy creation of masked images. You can create an image and mask it using another (grayscale) image. ]] CMasker = { }; CMasker.__index = CMasker; function CMasker: create( texture, mask ) local cShader = { shader = dxCreateShader( "50masktexture.fx" ), texture = dxCreateTexture( texture, "argb", true, "clamp" ), maskTexture = dxCreateTexture( mask, "argb", true, "clamp" ), }; dxSetShaderValue( cShader.shader, "ScreenTexture", cShader.texture ); dxSetShaderValue( cShader.shader, "MaskTexture", cShader.maskTexture ); self.__index = self; setmetatable( cShader, self ); return cShader; end function CMasker: draw( x, y, width, height ) if self.shader then dxDrawImage( x, y, width, height, self.shader ); end end function CMasker: destroy( ) if self.shader then destroyElement( self.shader ); end if self.texture then destroyElement( self.texture ); end if self.maskTexture then destroyElement( self.maskTexture ); end end 50masktexture.fx /* Author: 50p Version: v1.0 Description: This shader allows you to mask a texture with a mask texture (black and white). */ texture ScreenTexture; sampler implicitInputTexture = sampler_state { Texture = <ScreenTexture>; }; texture MaskTexture; sampler implicitMaskTexture = sampler_state { Texture = <MaskTexture>; }; float4 MaskTextureMain( float2 uv : TEXCOORD0 ) : COLOR0 { float4 sampledTexture = tex2D( implicitInputTexture, uv ); float4 maskSampled = tex2D( implicitMaskTexture, uv ); sampledTexture.a = (maskSampled.r + maskSampled.g + maskSampled.b) / 3.0f; return sampledTexture; } technique Technique1 { pass Pass1 { AlphaBlendEnable = true; SrcBlend = SrcAlpha; DestBlend = InvSrcAlpha; PixelShader = compile ps_2_0 MaskTextureMain(); } } Now, make sure the shader file (50masktexture.fx) is in the root folder of your resource otherwise change the path to the shader in c_50masker.lua. When you've done this, you're ready to use the CMasker class. How to use the class?: It's simple: local masked; addEventHandler( "onClientResourceStart", resourceRoot, function( ) masked = CMasker: create( "gtasa_radar_small.png", "mask.png" ); end ) addEventHandler( "onClientRender", root, function( ) if masked then masked: draw( 700, 250, 256, 256 ); end end ) Result: REMEMBER: When you don't need to use the masked image, use destroy method to free used memory! Example: masked: destroy();1 point
-
You said that you can do it, and you accepted that. And if you would have cared about someone's money, you would not have AT LEAST released Stocks script here. If i knew that you would do this, i would have never bought from you, i trusted you before because you was an old member of MTA:SA Forums.0 points