Leaderboard


![JN[T]OoOoL](https://forum.multitheftauto.com/uploads/monthly_2016_09/984afa88a4a9add7eb29755bebc2f8a7_82269.thumb.png.8283966639e6c3a50e468f99c5f8bc38.png)
Popular Content
Showing content with the highest reputation on 18/04/20 in all areas
-
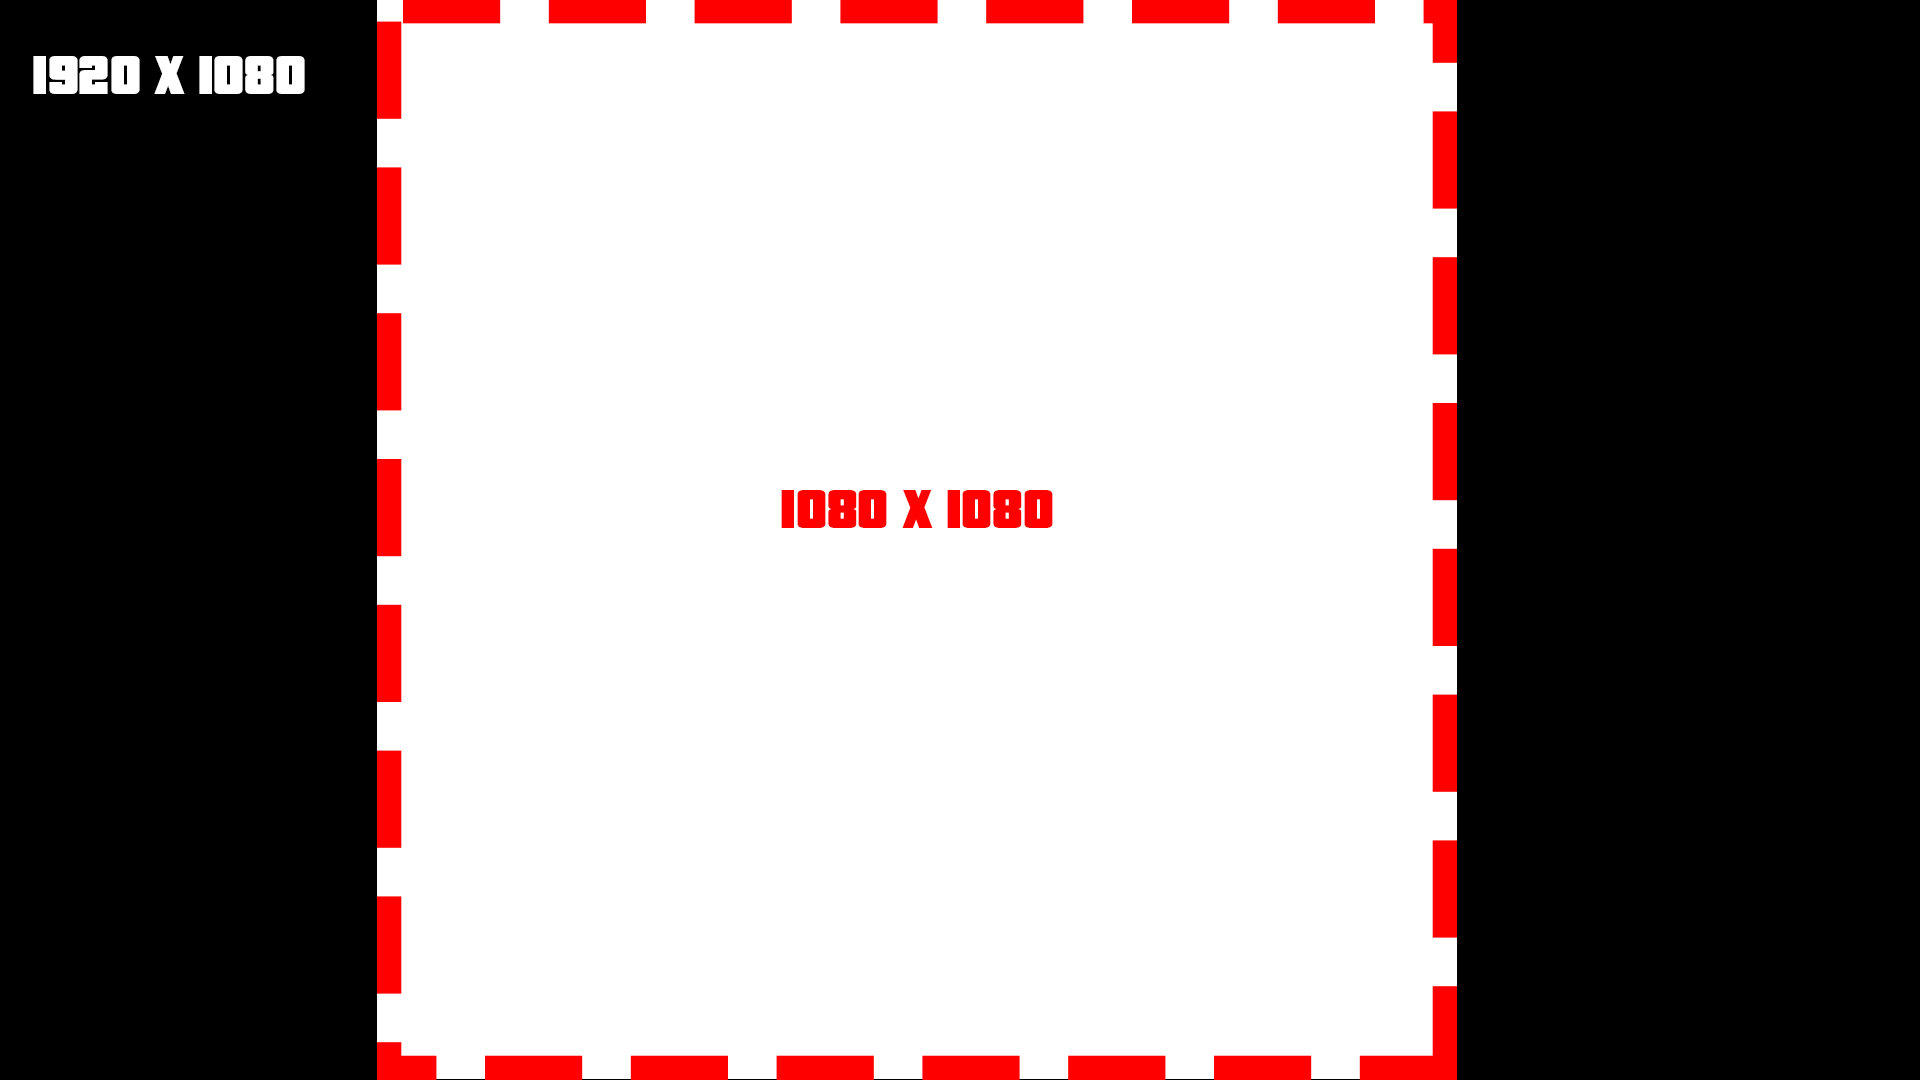
[TUT] Scaling DX The reason why I am creating this topic, is because there are a lot of people asking this question: And to be honest there is no best practice for. But here you have my recommendation as guidance for display them the ~s~a~m~e~ for all screen formats. There are two important factors while dealing with screen formats 1. Pixel density Indication: PPI(Pixels Per Inch) and some also use the term DPI(Dots Per Inch) They do not have to be the same while talking about printing stuff. This indication tells us about how many pixels are used per inch. Which more or less tells us how sharp/smooth things like text can be looking. PPI doesn't really play a big role, but to display something nicely you need enough pixels to display it. Else it will be either too small or too crispy. So be careful to not scale things (especially text) too small. 2. Display aspect ratio Wiki The difference between resolution X and resolution Y as a ratio. A list of common ratios: 4:3 5:4 3:2 16:10 16:9 So for example if we take: fHD: 1920x1080 Which has the ratio 16:9 that is calculated like this: 1920 / 16 = 120 120 * 9 = 1080 Scaling without ratio Before I am going to explain any of this, I am going to ask you an important question: Like this: (vertical) ▮ Or horizontal? ▅ I assume most people would agree to play MTA horizontal, else you are probably reading a book or document. p.s If you play MTA on a vertical screen, then we developers do not like you at all, sorry. So what does this tell us? You can assume that the X-resolution is never going to be smaller than the Y-resolution. Useful? You will figure it out. Doing the scaling Note: This part is ABOUT SCALING and not positioning. So what we are going to do is: Calculating a scale which can display the same DX on multiple screen formats > without messing with the ratio. Example: A computer runs MTA at a resolution of 1920 x 1080. Lets define that! local devScreenX = 1920 local devScreenY = 1080 If this code is used by a different pc, we also need to know on which resolution it is running: local screenX, screenY = guiGetScreenSize() For the next step we have to look at this screenshot: I have cut out of the wide-screen format a square. Squares have the ratio 1:1, which means that we have removed our ratio difference from this screen resolution. It is very easy to do, as our Y * Y resolution makes exactly that beautiful square! The next thing we have to do is creating our scaling value. This value is required for adjust our resolution values so that they match to every screen format. So to use our ratio 1:1, we use the Y resolution to achieve that: local scaleValue = screenY / devScreenY And as last we can create a rectangle shape that is displayed at the center of every screen format, perfectly! local devScreenX = 1920 local devScreenY = 1080 local screenX, screenY = guiGetScreenSize() local scaleValue = screenY / devScreenY addEventHandler("onClientRender", root, function () -- create a scaled size local sizeX = scaleValue * 300 -- 300px local sizeY = scaleValue * 50 -- 50px -- get the center of the screen local centerX = screenX / 2 local centerY = screenY / 2 -- calculate the starting point of the rectangle local startRectangleX = centerX - (sizeX / 2) local startRectangleY = centerY - (sizeY / 2) dxDrawRectangle ( startRectangleX, startRectangleY, sizeX, sizeY, tocolor ( 255, 255, 255, 255 ) ) end) Lower limit What if we have a resolution of 800x600? And the text is getting too small? Making sure that the pixel density is OK, is very important. So to counter that we have to make sure that the text is not getting too small. Our development Y resolution is 1080 pixels. And we are dealing with an Y resolution 600 pixels. The first thing we are going to look at, is what the scale is going to be at that point. 600 / 1080 = 0.55555555555555555555555555555556 It is not very nice to have your text scaled to 55.5% of the original size, when having low resolution already. But without scaling, the DX stuff might fill up the entire screen and that is just as bad. So what we now need is a limit, in this case a lower limit. scaleValue = math.max(scaleValue, 0.65) The math.max function returns the highest value of all the arguments you put in to it. In this case it contains the: scaleValue: 0.555 And the lower limit of: 0.65 This will make sure that the DX stuff is not getting smaller than 65%. This might make text read able for a 800x600 resolution. Positioning Do you want to place your dx-effects at a specific place on your screen? See the following useful function: https://wiki.multitheftauto.com/wiki/GetScreenStartPositionFromBox
 1 point
 -
MTA-Communication-Enhancement This is an enhancement that allows you to communicate between clientside and serverside a bit easier. If you know how to work with events, then you probably do not need this, but it has some nice features which allows you to sit back and write less code + achieve some nice results. Note: It is important to keep in mind that this is an enhancement. Which means it is just an layer on top of the basic functionalities of MTA. And most enhancements come with a cost, in this case that is bit of performance. I will keep the information of topic to the minimal, as I have written most of the information already on the repository. You can find the repository here. Examples Syntax Installation What can you do with it? Calling from clientside to serverside Client callServer("hello") Server function hello () outputChatBox("Hello client!") end Calling from serverside to clientside Server addCommandHandler("callclient", function (player) -- An addCommandHandler is needed, because the client hasn't loaded it's scripts yet. callClient(player, "hello") end, false, false) Client function hello () outputChatBox("Hello server!") end Ok, ok, that was boring. The next one this is a bit nicer! Hello are you there? Just Call-me-back... I miss(ed) you too Callback Client callServer( "callbackMe", "argument", function (argument) -- < This is the callback function outputChatBox(argument) end ) Server function callbackMe (argument) return argument .. " < I looked at it :)" end Callback + internal arguments Sometimes you have arguments that you simply can't send over. > functions Or arguments that shouldn't be send over. > LARGE quantities of database data Internal arguments can be used to pass information to a callback without exposing it to the other side(client/server). Client callServer( "callbackMe", -------------------------------- -- arguments that are send over "argument", -- -------------------------------- function (internalArgument, argument) -- < This is the callback function. outputChatBox(internalArgument) outputChatBox(argument) end, -------------------------------- -- arguments that are not send over "internalArgument" -- < internal argument -- -------------------------------- ) Server function callbackMe (argument) return argument .. " < I looked at it :D" end Ha! Serverside what is that? No need for complicated things! Communicate between clients without writing a single line of serverside. Magic! Note: There is serverside used behind the scenes, you just don't have to write it. Client function smile (player) outputChatBox((isElement(player) and getPlayerName(player) or "[unknown]") .. " has send you a: :)") local x, y, z = getElementPosition(localPlayer) setElementPosition(localPlayer, x, y, z + 100) end addRemoteClientAccessPoint(smile) -- < This function allows other clients to call this function. --------------------------------------- -- -- function getPlayerFromPartialName(name) local name = name and name:gsub("#%x%x%x%x%x%x", ""):lower() or nil if name then for _, player in ipairs(getElementsByType("player")) do local name_ = getPlayerName(player):gsub("#%x%x%x%x%x%x", ""):lower() if name_:find(name, 1, true) then return player end end end end -- Author: TAPL -- https://wiki.multitheftauto.com/wiki/GetPlayerFromPartialName -- -- --------------------------------------- addCommandHandler("smile", function (cmd, playerName) local player = getPlayerFromPartialName(playerName) if player then outputChatBox("Sending smile!") callRemoteClient(player, "smile", player) else outputChatBox("Can't find player!") end end) Turtle, I will wait for you to catch up. So don't worry, you are still cute. Await functions When a player has joined the server, he or she doesn't have download + loaded his scripts yet. This means that you can't deliver your love letter yet and all your work will be for nothing. But what if you don't have to worry about that? You can just wait now! Server addEventHandler("onPlayerJoin", root, function () callClientAwait(source, "testCallClientAwait") end) Client function testCallClientAwait () outputChatBox("Yes this works!") end Security Worried about security issues? Remote calls for C++/MTA functions have been blocked. There is a whitelist feature included, if enabled your code can only remote-call whitelisted functions. (this is disabled by default) Read the docs for that. Here and here1 point
-
Hello there , i'm here to buy Mystery Box from cod black ops zombies , make it for mta sa and created a 3d object by 3ds max and i wanna sell it for : $10 Video :1 point
-
بسم الله الرحمن الرحيم السلام عليكم ورحمة الله وبركاتة أخبار الشباب عساكم طيبين , اول مساهمة تقريبا وثالث موضوع لي المهم حبيت اطرح ماب الاستراحة لسيرفر كنق الطارة الماب محوله من 2018 وركبته بالسيرفر تقريبا سنه وشوي وقررت اطرحه للعموم وأحول شيء جديد المهم مالكم بالطويلة الماب من تصميمي والمجسم من تحويلي والتكستر من اختياري الماب جاهز ماعليك الا انك تركبة بالاستضافة وتشغله والتعديل مفتوح سواء عالصور او اضافات عالمجسم ورجاءا حفظ الحقوق صور للماب او المجسم مادري اذا الصور بتظهر زمان عالمنتديات طبعا المركبات الي بالصور مو من ضمن الماب ذي عشان تعطي موارد للصورة رابط تحميل الماب و المجسم لااله الا الله,محمد رسول اللة وسلامتكم فأمان الله ورعايته حسابي انستقرام :jn_i ip Server:149.202.89.124:22003 ......1 point
-
Utilize o botão <> do fórum para postar códigos. Veja as regras do fórum aqui:1 point
-
Wow, stai linistit nu ma sperie pe mine cineva care vine sa arunce cu kkt ca de'..., insa ma bucura faptul ca exista moderatori inca prezenti si activi pe comunitatea romaneasca de MTA. Serverul din pacate nu mai este activ din lipsa de jucatori, nu mai am timp sa "il fac cunoscut" asa ca, cred eu lumea nu stie de existenta lui, iar jucatorii nu vin sa caute servere aici pe forumuri. Gamemodu pentru cei care sunt in dubii este o versiune veche a originalului MTA DayZ 0.6 + Zday by zorgman modificate de mine la maxim cu foarte multe inbunatatiri si bug fix-uri MTA:DayZ 0. Source Code! pentru cunoscatori. Da intradevar contine ceva ramasite de la RoZ si cateva moduri de pe comunitate, iar skinurile va spun de pe acum ca nu eu le-am facut, insa chiar si asa toate astea is modificate atat de mult de mine incat nu mai au practic nicio legatura cu orginalele. Chiar daca nu sunt sigur ca o sa il mai deschid serverul, va las aici un mic istoric cu ce vreau sa mai aduc pe server (care probabil va fi lansat ca open source/free to download pe comunitate): Toate mesajele vor fi afisate in dreapta jos, in acest mod pe chat vom vedea doar discutiile. Imbunatatit AI zombii (recunosc ca aici ma autoprovoc umpic dar na..) CJ skin customizabil. (Da stiu prea TOP-GTA, da ce sa fac daca nesimtitii astia s-au gandit inainte-a mea) Basebuilding (Garaje, Hangare sau hambare pe care veti putea sa le customizatii la interior desigur cu vesnica protectie inbunatatita) Sistemul de Login inbunatatit cu password recovery. Multumesc pentru timpul acordat.1 point
-
bindKey getElementMatrix getDistanceBetweenPoints3D findRotation3D --https://wiki.multitheftauto.com/wiki/FindRotation3D getTickCount createProjectile "onClientRender" "onClientPreRender" --(timeSlice benefit) function getPositionFromElementOffset(element,offX,offY,offZ) local m = getElementMatrix ( element ) -- Get the matrix local x = offX * m[1][1] + offY * m[2][1] + offZ * m[3][1] + m[4][1] -- Apply transform local y = offX * m[1][2] + offY * m[2][2] + offZ * m[3][2] + m[4][2] local z = offX * m[1][3] + offY * m[2][3] + offZ * m[3][3] + m[4][3] return x, y, z -- Return the transformed point end Just one of the concepts you can use: This function allows you to calculate the distance between a line and a point. This can be very powerful, when you combine that with getPositionFromElementOffset, because that function allows you create offset points from the vehicle. These offset points can be used to create a line in front of you, which you can use to compare the distance between all vehicles. Now you will able to exclude most of the vehicles behind you. Be creative, there a lot of options out there to do the same based on other mathematics calculations like rotation. (which you can also include as another layer) local getDistanceBetweenPointAndSegment3D = function (pointX, pointY, pointZ, x1, y1, z1, x2, y2, z2) -- vector1 -- local A = pointX - x1 local B = pointY - y1 local C = pointZ - z1 -- -- vector2 -- local D = x2 - x1 local E = y2 - y1 local F = z2 - z1 -- local point = A * D + B * E + C * F local lenSquare = D * D + E * E + F * F local parameter = point / lenSquare local shortestX local shortestY local shortestZ if parameter < 0 then shortestX = x1 shortestY = y1 shortestZ = z1 elseif parameter > 1 then shortestX = x2 shortestY = y2 shortestZ = z2 else shortestX = x1 + parameter * D shortestY = y1 + parameter * E shortestZ = z1 + parameter * F end local distance = getDistanceBetweenPoints3D(pointX, pointY,pointZ, shortestX, shortestY,shortestZ) return distance end Another concept: You can just simple use getDistanceBetweenPoints3D on a point in front of you. If you make the detection size 300 units and you do it 300 units in front of you. You will be able to capture all vehicles in front of you inside of a giant circle. > From that segment you can use getDistanceBetweenPoints3D again to compare the vehicle distance from the hydra and all other vehicles and this time you use a detection size of 150 units.1 point
-
Aquí tienes algunos ya hechos: https://community.multitheftauto.com/index.php?p=resources&s=details&id=15822 https://community.multitheftauto.com/index.php?p=resources&s=details&id=158491 point
-
Lua kişisel eğitim veren kimse yok, ingilizce kaynakları okuyarak kendinizi geliştirmeniz gerekiyor. https://wiki.multitheftauto.com/ https://www.Lua.org/start.html1 point
-
Não está funcionando, pois, está apenas faltando criar a tabela do chatTime local range = 100 local chatTime = { } --/> ADD local lastChatMessage = { } addEventHandler("onPlayerChat", root, function ( text, msgType ) local name = _getPlayerName( source ) local text = string.gsub( text,'#%x%x%x%x%x%x', " ") if ( msgType == 1 ) then return cancelEvent(true) end if ( msgType == 0 ) then cancelEvent(true) if chatTime[source] and chatTime[source] + tonumber(150) > getTickCount() then return outputChatBox("Evite Fazer SPAM.",source,255,0,0) else chatTime[source] = getTickCount() end if lastChatMessage[source] and lastChatMessage[source] == text then return outputChatBox("Evite Mensagem Repetida.",source,255,0,0,true) else lastChatMessage[source] = text end cancelEvent(true) local x,y,z = getElementPosition(source) for i, player in pairs(getElementsByType("player")) do local px,py,pz = getElementPosition(player) local distance = getDistanceBetweenPoints3D(x,y,z,px,py,pz) if ( distance < range ) then outputChatBox("[ Chat Local ] "..name.." #FFFFFF: "..text, player, 255, 255, 255, true) end end end end) function _getPlayerName (player) local playerTeam = getPlayerTeam(player) if (playerTeam) then local r,g,b = getTeamColor(playerTeam) local color = RGBToHex(r,g,b) playerName = color..getPlayerName(player) else playerName = "#FFFFFF"..getPlayerName(player) end return playerName end function RGBToHex(red,green,blue) return string.format("#%.2X%.2X%.2X",red,green,blue) end1 point
-
@FIY9AL You could also add: function displayCountDown(hh, mm, ss, format, countdownFin) if countdownFin then countdown = setTimer(countdownFin, direction+1000, 1) end Else there the callback function is very static.1 point
-
Events tutorial The reason why I created this topic, is that a lot of people are struckeling with them. In this tutorial I will only discus the very basic of them. If you want more, then there is a list of links at the end with more information. If I made any mistakes in the code, please let me know because I am not going to test every part. What are events? (basic description) Events are something custom added by MTA to make it easier to bring scripting(Lua) closer to our game. If we do not have events, then the only thing we can do is give instructions to our game. But our code will never detect changes in our game. The same question again: "So what are the events?" Events are a way to communicate changes in our game to our scripts (or from our scripts). So for example my little ped(cat) gets ran over by a car. Then I really want to know about that, don't I? When an event activates, I describe this as: triggered (from the word trigger) Full wiki information can be found here: Event_system Before we can use events, what do we need to know? There are two things we need to know: The reason why it is triggered. <What happens?/when something happens?> In MTA this is the eventName of the event. (Example: you <ran over> my ped) Who is the one using the event? The event system in MTA is using elements as base (baseElement). This makes it easier to combine the what/when happens? with the one who is related to it. In MTA this is the source of the event. (Example: you ran over my <ped>) Trigger an event A scripting example: (this is not an official event) local ped = createPed( 120, 5540.6654, 1020.55122, 1240.545 ) -- my ped triggerEvent("onPedRanOver", ped) In this example, a custom event gets triggered to tell you that my new created ped has been ranOver. The eventName is "onPedRanOver" and the baseElement is ped. local ped = createPed( 120, 5540.6654, 1020.55122, 1240.545 ) -- my ped local drunkDriver = getRandomPlayer() triggerEvent("onPedRanOver", ped, drunkDriver) In this SERVERSIDE example, I am also adding an extra argument drunkDriver to use the player that ran over the ped. This is not required, but it makes it more complete. See syntax. Syntax bool triggerEvent ( string eventName, element baseElement, [ var argument1, ... ] ) TriggerEvent Receiving triggers Receiving triggers is a bit more complicated, because there are a lot of options for it. You can receive events by listening to them. It is like: You know that something is going to happen but you do not know when. The first step that you have to take is related to this question: "Do I want to receive a custom or not custom event?" Custom events are self created events. They only exist when a scripter makes them. Two lists of NOT CUSTOM EVENTS but default MTA events, serverside and clientside: Server_Scripting_Events Client_Scripting_Events Do I want to receive a CUSTOM event? In case of a custom event, you have to register/enable it first. If you do not enable it and trigger it, you will receive a warning/error about that in your debug console. Syntax bool addEvent ( string eventName [, bool allowRemoteTrigger = false ] ) AddEvent The example below, shows you how to enable a custom event only for trigger events within the same server/client side. addEvent("eventName") -- Is the same as: addEvent("eventName", false) If you put the second argument to false or not fill it in, this means that you can't communicate from the other server/client-side. This option is most likely used for security reasons. Some events shouldn't be able to trigger by the other side For example, worst case scenario: (remote events enabled for a default MTA event) Serverside code: addEvent("onPlayerWasted", true) Clientside code: triggerServerEvent("onPlayerWasted", player, 0, localPlayer, 0, 9, false) OnPlayerWasted If this event is enabled for remote trigger events, then it might be possible to cheating kills/deaths score. Of course, it is not likely that players can run their own clientside code, but it is not impossible in case of not trust able community resources. Enable a custom event for trigger events that crossing sides (From clientside to serverside. From serverside to clientside). addEvent("eventName", true) This event can now be used by remote trigger event functions. See list: Client to server TriggerClientEvent TriggerLatentClientEvent Server to client TriggerServerEvent TriggerLatentServerEvent Enable the event from our previous example: addEvent("onPedRanOver", false) local ped = createPed( 120, 5540.6654, 1020.55122, 1240.545 ) -- my ped local drunkDriver = getRandomPlayer() triggerEvent("onPedRanOver", ped, drunkDriver) If you do not use cross triggering, then I recommend to use the addEvent function in the same resource as where you are going to trigger from. This makes sure that the event is already added and that you will never receive this kind of error/warning "Event isn't added". If you put it in another resource which hasn't started yet, then after triggering you would still receive that error/warning. Start listening The next step is to add the addEventHandler. This function is used to listen to events. When an event is triggered, this handler(addEventHandler) will call the function you have attached to it, in MTA this function is called the handlerFunction. Syntax bool addEventHandler ( string eventName, element attachedTo, function handlerFunction [, bool getPropagated = true, string priority = "normal" ] ) AddEventHandler Resource 1 addEvent("onPedRanOver", false) local ped = createPed( 120, 5540.6654, 1020.55122, 1240.545 ) -- my ped local drunkDriver = getRandomPlayer() triggerEvent("onPedRanOver", ped, drunkDriver) Resource 2 function handlerFunction () end addEventHandler("onPedRanOver", root, handlerFunction) The first 3 arguments, the require ones: eventName attachedTo handlerFunction Making sure that the addEventHandler options are correct set-up. Resource 1 addEvent("onPedRanOver", false) local ped = createPed( 120, 5540.6654, 1020.55122, 1240.545 ) -- my ped local drunkDriver = getRandomPlayer() triggerEvent("onPedRanOver", ped, drunkDriver) Resource 2 function handlerFunction () end addEventHandler("onPedRanOver", root, handlerFunction) There are two conditions for an eventHandler to call the handlerFunction. 1. The event has to be exactly the same. In this case the event "onPedRanOver" is the same in both resources. 2. In both functions, triggerEvent and addEventHandler is an element being used. This element has to be exactly the same. (from where you trigger as well as where you receive) <OR> The triggered element from resource 1, has to be a CHILD of the element in resource 2. The root element is the very top layer of the MTA element structure. It will accept all elements you want to use for your events. See the element tree: If you do not understand the element tree please read this page: Element_tree Source variable The source of an event is the element that triggers the event. This variable isn't passed as an parameter, but it is predefined. This means that it is already created before hand. Some predefined variables do only exist under special conditions. The source variable is one of those, it is a hidden and local variable which is only available when a function is called by an event. List of predefined variables. addEvent("onPedRanOver", false) -- local ped = createPed( 120, 5540.6654, 1020.55122, 1240.545 ) -- my ped local drunkDriver = getRandomPlayer() triggerEvent("onPedRanOver", ped, drunkDriver) function handlerFunction (drunkDriver) iprint(source) -- ped element end addEventHandler("onPedRanOver", resourceRoot, handlerFunction) In this example the ped is the source. See how those two code blocks are connected: addEvent("onPedRanOver", false) -- local ped = createPed( 120, 5540.6654, 1020.55122, 1240.545 ) -- my ped local drunkDriver = getRandomPlayer() triggerEvent("onPedRanOver", ped, drunkDriver) function handlerFunction (drunkDriver) iprint(source) -- ped element end addEventHandler("onPedRanOver", resourceRoot , handlerFunction) resourceRoot In some examples, you see people use the resourceRoot instead of the root element for their addEventHandlers. The resourceRoot is an element created by a resource. This element holds all elements of that resource as (in)direct children. In the example above, the resourceRoot as baseElement will not work, because there are two resources. Each resource has it's own resourceRoot element. The resourceRoot is accessible with the same keyword: resourceRoot, but if you were to inspect the element in multiple resources, then the user data (element identifier) value is not the same. outputChatBox(inspect(resourceRoot)) If we were to put everything in one resource, then it would work: ? addEvent("onPedRanOver", false) -- function handlerFunction () end addEventHandler("onPedRanOver", resourceRoot, handlerFunction) -- local ped = createPed( 120, 5540.6654, 1020.55122, 1240.545 ) -- my ped local drunkDriver = getRandomPlayer() triggerEvent("onPedRanOver", ped, drunkDriver) In case of remote triggering, the resourceRoot in serverside and clientside is considered the same.(As long as they are part of the same resource) Why/when would we use resourceRoot? 1. Limit eventHandlers to the resource elements If you have 1000 markers in your server. One of the resources is for example a trucker mission, where you can get money by hitting markers. The resourceRoot element will make sure that the onMarkerHit event will only trigger for markers created by that resource. addEventHandler("onMarkerHit", resourceRoot, function () -- source element is the marker end) OnMarkerHit 2. Another benefit is that you are able to re-use the same eventNames. Resource 1 addEvent("onPedRanOver", false) function handlerFunction () end addEventHandler("onPedRanOver", resourceRoot, handlerFunction) -- local ped = createPed( 120, 5540.6654, 1020.55122, 1240.545 ) -- my ped local drunkDriver = getRandomPlayer() triggerEvent("onPedRanOver", ped, drunkDriver) Resource 2 addEvent("onPedRanOver", false) function handlerFunction () end addEventHandler("onPedRanOver", resourceRoot, handlerFunction) -- local ped = createPed( 120, 5540.6654, 1020.55122, 1240.545 ) -- my ped local drunkDriver = getRandomPlayer() triggerEvent("onPedRanOver", ped, drunkDriver) These two resources do use the same event, but will not trigger each other their addEventHandlers. Warning: If root was used, then they will!!!! ;@ Lets cross triggering with resourceRoot! Clientside triggerServerEvent("example", resourceRoot) Serverside addEvent("example", true) -- second argument is true! cross triggering enabled! addEventHandler("example", resourceRoot, function () end) getPropagated In this bigger example we will be talking about the option getPropagated. If this option is disabled, it will not detect children any more. Keep reading! After that start code scanning from A, to B and then to C. Syntax addEventHandler bool addEventHandler ( string eventName, element attachedTo, function handlerFunction [, bool getPropagated = true, string priority = "normal" ] ) Example: Clientside -- A triggerServerEvent("onClientPlayerLoaded", resourceRoot) -- trigger an event to serverside --------------------------------------- -- C addEvent("onResponseServer", true) -- first listener addEventHandler("onResponseServer", resourceRoot, function () outputChatBox("getPropagated enabled") end, true) -- getPropagated true by default. -- second listener addEventHandler("onResponseServer", resourceRoot, function () outputChatBox("getPropagated disabled") end, false) -- getPropagated is false. Serverside -- B addEvent("onClientPlayerLoaded", true) -- second argument is true! cross triggering enabled! addEventHandler("onClientPlayerLoaded", resourceRoot, function () --[[ client is a predefined variable, which represents the client/player that communicates with the server More information about predefined variables: https://forum.multitheftauto.com/topic/33407-list-of-predefined-variables/ ]] triggerClientEvent(client, "onResponseServer", resourceRoot) -- first trigger event local element = createElement("randomElement") -- making a randomElement triggerClientEvent(client, "onResponseServer", element) -- second trigger event end) How does this this code works? A. When a client his code has been started, it will execute a triggerServerEvent. (It doesn't wait for any other clientside files to be loaded) B. The server receives the event. And sends two triggerClientEvents back: The first one is using the resourceRoot as baseElement. The second one is using a randomElement as baseElement. Both are using the event "onResponseServer" C. There are two addEventHandlers listening to the event: "onResponseServer" The first one is using getPropagated and the second one is not using getPropagated. The randomElement that is created, is by default an indirect child of the resourceRoot of the same resource. What will happen? When firing the first trigger event, both listeners will call their handlerFunction. But when firing the second trigger event, only the first listener will call it's handlerFunction. The randomElement is an indirect child of resourceRoot, but because getPropagated is disabled it will not call it's handlerFunction. Other tutorials related to this one: See also this tutorial about deeper limiting event ranges within your resource and reducing addEventHandlers https://forum.multitheftauto.com/topic/100069-tut-addeventhandler-on-a-group-of-elements-small-tutorial/ More information Full wiki information: Event_system A list of more information about triggering events: (Client to client / server to server) TriggerEvent Client to server TriggerClientEvent TriggerLatentClientEvent Server to client TriggerServerEvent TriggerLatentServerEvent A list of more information about receiving events: AddEvent AddEventHandler RemoveEventHandler Two lists of MTA events, serverside and clientside: (warning: not custom events) Server_Scripting_Events Client_Scripting_Events Cancel events CancelEvent WasEventCancelled (warning: custom events ONLY) GetCancelReason (Server only) Cancel latent events and their status GetLatentEventHandles CancelLatentEvent GetLatentEventStatus1 point