Leaderboard
Popular Content
Showing content with the highest reputation on 12/07/24 in all areas
-
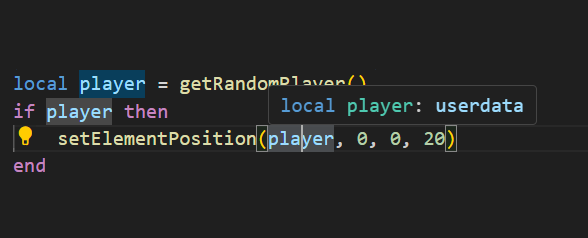
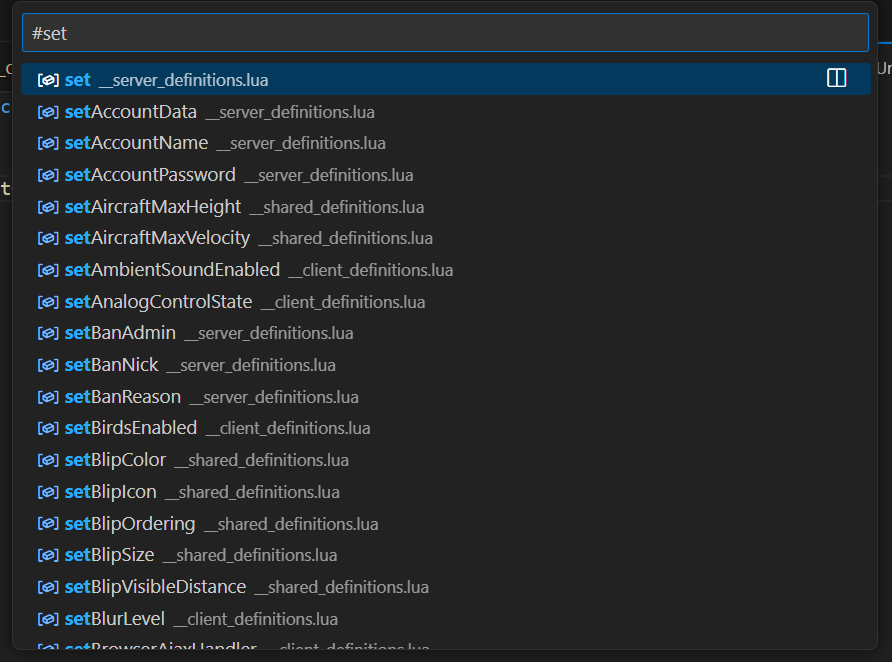
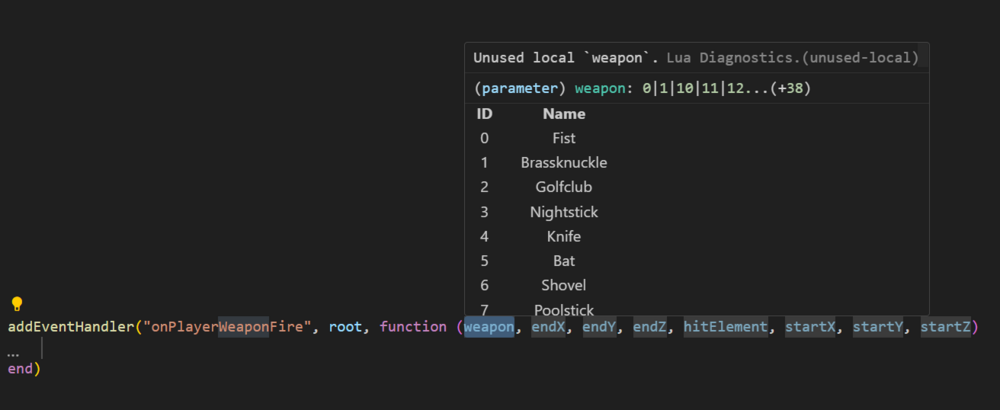
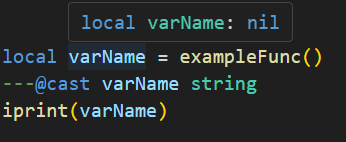
Lua Language Server - Definition files The Lua language server is a powerful tool that enhances the development experience for Lua programming. It provides a comprehensive set of code editing features, including suggestions, auto-completion, and error checking. With the Lua language server, developers can effortlessly navigate through their resource files, access documentation easily, and ensure code correctness by giving warnings. Why should you care? The language server will inform you about all sorts of problems: type mismatches, missing function arguments, missing variables, etc. You have access to a lot of MTA syntax/autocomplete out of the box. The syntax information will remain while writing. You do not have to restart your resource so often in order to validate if everything is working. Type validation Having value type validation in your code editor is one of the main key features of the Lua Language Server. When working with variables, parameters, and arguments in Lua, you are not restricted to specific value types. This flexibility can make mistakes more likely to happen. However, being able to validate those mistakes instantly saves you a lot of time and frustration. Type annotations for your own functions Adding type annotations to your own functions can help improve validation and catch logic mistakes. It is particularly useful when calling functions from different parts of your code, as the annotations provide clarity on the expected input (arguments) and output (return values). Additionally, comments that are placed above or adjacent to a variable or function are visible when hovering over them in another file or line. This can provide helpful information and context when working with the code. How that looks like: How can I quickly add annotations in less than a second? Open the spoiler: AddEventHandler auto-complete Most MTA addEventHandler functions have full eventName autocompletion. And the attached anonymous function is fully autocompleted and typed as well. Navigation features of Lua Language Server It can be time consuming to find out where a (global) function or variable is located. Being able to jump right to it, saves you a lot of time. Other information which you can find in the readme Installation for the Lua Language Server How to use the definition files? Known issues Make sure to always have an empty new line at the end of your files, as recommended in this issue. Currently, the Lua server language definition files do not have a clear separation between serverside functions/events and clientside functions/events. However, it is possible to enforce this separation for specific functions if needed. outputChatBox--[[@as outputChatBox_server]]("Serverside", player) In certain cases, certain functions in the Lua server language definition files may return multiple types, even if you have selected a different syntax. To handle this situation, you can use the `cast` or `as` notation to explicitly specify the desired type or adjust the returned type. See `Casting and as` syntax below. Casting and as In certain situations, you may have a strong understanding of the type(s) that a variable or expression will have. This is where the keywords "cast" and "as" come into play. These keywords enable you to explicitly specify the intended type, ensuring proper type handling. local varName = exampleFunc() ---@cast varName string local varName = exampleFunc() ---@cast varName string | number local varName = exampleFunc() --[[@as string]] local varName = exampleFunc() --[[@as string | number]] Download The definition files can be downloaded here.1 point
-
Debugging Do you know what debugging is? You might think you do, but unfortunately (in my opinion) only ~15% of the scripters in the community do know the full definition of it. Many people think that debugging code is the same as looking in to the Debug Console and waiting for warning + errors to show up. That's indeed debugging and yet it never provide all information you need to build your scripts. It only can say what goes wrong at a certain line. With other words, the Debug Console by default will only show a limited amount of mistakes you have made in your code. So what is next? You fixed all warnings and errors and yet it doesn't work. You start with making your code visible! I guess 70% would think: Making code visible? Ehhh how??? Let me write it down a little bit different: By using Debug Information making the behaviour of the code visible. I guess 50% would think: Eh what? behaviour of code????? Let me give you an example. Example: (1) outputDebugString("the script has started") -- < this is a debug line if true then outputDebugString("code works here") -- < this is a debug line else outputDebugString("code shouldn't be working here") -- < this is a debug line end Debug console "the script has started" "code works here" The debug console is NOT information for players, it is information for YOU developers! BTW this is a debug line outputDebugString("test") -- < this is a debug line In this case it is just a piece of code that shows information in the debug console. Example: (2) local playerName1 = "snake1" local playerName2 = "cow" if playerName1 == playerName2 then outputDebugString("players playerName1 and playerName2 do share the same name. Name: " .. tostring(playerName1)) -- < this is a debug line else outputDebugString("players playerName1 and playerName2 do NOT share the same name. playerName1: " .. tostring(playerName1) .. ", playerName2: " .. tostring(playerName2)) -- < this is a debug line end Debug console "players playerName1 and playerName2 do NOT share the same name. playerName1: snake1, playerName2: cow" Easy isn't? The concept behind this debug method is to see what the code does / doesn't execute. Is this method handy? It is actually the very basic of debugging, for code that doesn't contain any errors/warnings. I would say it is handy and it is a very powerful method too. It is also handy for people who do not know how to script. If you want people to help you with your code, but you do not know what is wrong with it. You can add those debug lines and point out to where the code stops working. This will make it more efficient for you and the scripter to work out the problem, because the scripter knows where to look. How much debug lines do you have to add to your script? 1? 10? 100? 1000? You could start with around 100 debug lines and as you learn how to script, you can reduce it to 10+ debug lines. Too much debug lines are not always good, because they will give you too much information and it will cost time to manually filter them. So I recommend you to remove some of them afterwards. When you are finished with the tested code, you can remove 90+% of them. Feel free to disable them instead of removing them, if you know that you are going to need them again. For complex code, I use around 25 debug lines, SO DON'T HOLD BACK! Render events It is strongly recommended to remove debug lines that are executed on onClientRender/render events when you are finished with your code. Because that can have influence on the smooth fps.(It will not drop much of the fps, but it can make it feel unsmooth) Clearing the debug console? /cleardebug Know your tools: outputDebugString -- Show a message on the Debug Console bool outputDebugString ( string text, [ int level=3, int red=255, int green=255, int blue=255 ] ) --- outputConsole -- Show a message on the F8 panel. bool outputConsole ( string text ) -- client bool outputConsole ( string text, [ element visibleTo=getRootElement() ] ) -- server --- inspect -- Convert one mixed value to a string. string inspect ( mixed var ) --- print -- Show a message on the terminal / serverwindow / Debug Console. bool print ( string var1[, string var2, string var3...] ) --- tostring() -- Convert a value in to a string. (but for objects/elements, inspect works better) --- iprint -- Show a message on the terminal / serverwindow / Debug Console (convert multiple mixed values automatic to string, no need for tostring or inspect) bool iprint ( mixed var1[, mixed var2, mixed var3...] ) --- outputChatBox -- You can also debug with outputChatBox (even though it is less efficient) bool outputChatBox ( string text [, int r=231, int g=217, int b=176, bool colorCoded=false ] ) -- client bool outputChatBox ( string text [, element visibleTo=getRootElement(), int r=231, int g=217, int b=176, bool colorCoded=false ] ) -- server Debug message levels 0: Custom message 1: Error message 2: Warning message 3: Information message (default) Addition by @Hale https://wiki.multitheftauto.com/wiki/OutputDebugString Advanced tools: local line = debug.getinfo(1).currentline -- get the line of the script where the code has been executed. 1 = current function. (can be useful if you want to get the line where this function has been called from) https://www.lua.org/pil/23.1.html WIKI MTA: WIKI MTA debugging tutorial/information. https://wiki.multitheftauto.com/wiki/Debugging1 point
-
Download: https://community.multitheftauto.com/?p=resources&s=details&id=15260 The best vehicle reflection shader around, unique: takes no FPS toll. It looks close to real ENB and it has rewritten effects which uses techniques to avoid performance toll like all circulating shaders suffer from; f.e, it creates reflection based purely on GTA default surface materials. @Ren_712, the most recognized FX/shader developer around MTA, assisted with rewriting the effect not long ago, but has never released it. Until now, it was a resource private to me based on a custom order I gave to Ren_712. It took weeks of development to get it to it's current appearance and a few months to perfect it, as it's tricky to try recreate ENB with MTA FX and make the reflection appear more qualitative than existing ones, while also scrapping any performance toll. I may be claiming it's ''the best'' around, but it's for you to judge: https://imgur.com/a/U8MLN. I am convinced that it is due to several factors: it looks deeper/has a qualitative reflection (almost) simulating ENB, eliminating GPU performance toll while doing that (the appearance) even better than preceding released shaders (which did take a toll), making it the ultimate combination. Open spoiler for sample images of reflection effect: Some will like the ENB resemblance, and others will find the reflection too shiny or deep. You can modify that easily and adapt it to your wishes using the variables in client_carshader.lua. The intensity, brightness, deepness and visibility of the reflection can be tweaked in there, so you can make a ''custom'' version just like ENB's get edited and released as custom ENB. You can make it look differently (more than just less prominent effect) while retaining the optimized techniques it uses against lag. It's possible to simulate the lightest possible shader that doesn't look ''extremely reflective''.1 point
-
1 point
-
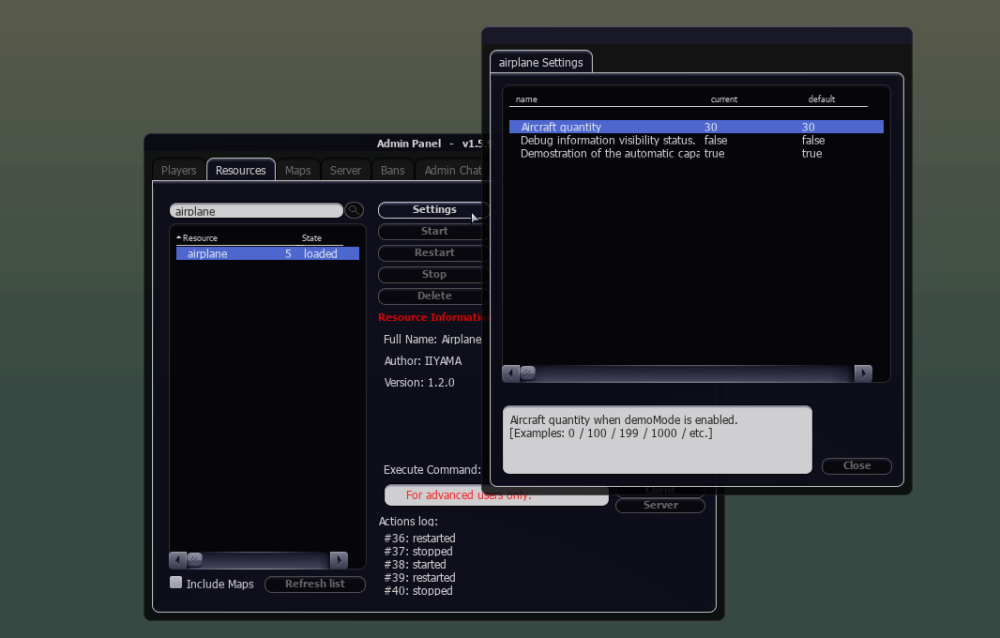
Airplane This resource adds ambient aircraft to your MTA map. As many as you want, as long as the MTA element stream engine likes it. The aircraft models can be modified in config_s.lua. The resource was pre-mentioned in the Server time sync resource, because it is was an example resource which made use of serverside time. (And still makes use of) But by posting updates there for a different resource is a bit confusing. It is beyond a test resource now. Note: you still need to download the server time sync resource for this resource to work. You will be given an option to download server time sync resource, when you the download the resource airplane. The resource doesn't only creates planes, but also helicopters. Which is confusing I know, since the resource name is 'airplane'. But it was already too late for that without losing my version archive. Version 1.2.0 / 1.1.1 video's Admin settings Quantity aircraft Developermode Displaying the airplanes and other useful information. Demomode true - Let the resource create the aircraft false - Fill in your own aircraft list manually in file: config_s.lua How the aircraft is adjusted according to the GTA map. The blue crosses are used to display the max ground height of that specific area(200x200). You see that the crosses are placed higher near trees and buildings. The resource will adjust the aircraft height according to this data. This view is visible when development mode is active and some adjustments in the config_s.lua for the ground height data. Dataset for the aircraft height is available here: https://wiki.multitheftauto.com/wiki/Dataset-map-height Pro's: Low CPU usage after initialization. No network usage after initialization. Only the dependency server time sync will use network usage after initialization. Not that many lines of code for you have to scan through, if you want to modify the resource. Simple to implement. If you find a bug, I will be here. Con's No AI implementation. Brain-dead AI. The 'time based driven (animations)' concept is used, not everybody is familiar with that concept. That makes it harder to edit. It basically means that the aircraft animations are unstoppable, since time doesn't stop either. Pro: Which nearly nullifies the need of constant network usage between the server and the client. All aircraft are indestructible (even if not set to damage proof). (Can also be a pro) But I might add something in the future to counter that... but I first must figure out how that is suppose to work. Does not work outside of the GTA map. Download link: Resource Airplane Other downloads: Resource Server time sync Dataset GTA map height1 point
-
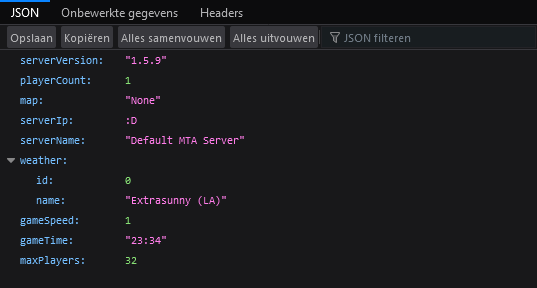
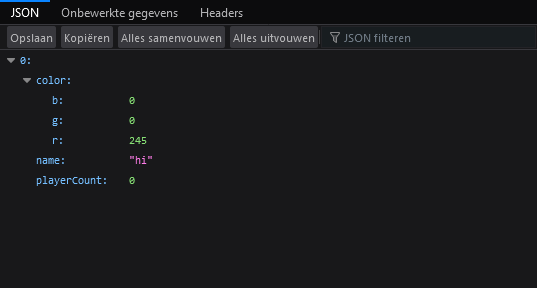
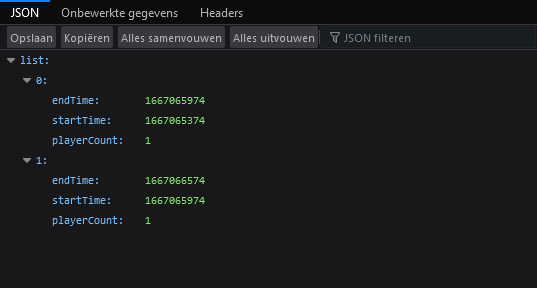
Serverinfo This resource is a small API for MTA server info, which you can modify / expand to your liking. It is many used to display information about the current state if the server. Like for example how many players are playing. Read the installation carefully, because you certainly do not want to put your admin login credentials online. ? Note: before you even download this resource, test if your web interface is even available. Start your server. Open a web browser and fill in your (local) IP and standard port. If it ask for a username and password, it looks like it is OK. If not, something doesn't seems to be correct. !Server hosts that are based on slots, might have disabled the exposure of the web interface. <ip>:<port> Endpoint: <ip>:<port>/<resourceName>/api/<endpointName>.json Local ip and standard port: http://127.0.0.1:22005 Analytics http://127.0.0.1:22005/serverinfo/api/analytics.json Team info http://127.0.0.1:22005/serverinfo/api/teamList.json Chat history http://127.0.0.1:22005/serverinfo/api/chat.json Generic info http://127.0.0.1:22005/serverinfo/api/info.json Player info http://127.0.0.1:22005/serverinfo/api/playerList.json Download: https://community.multitheftauto.com/?p=resources&s=details&id=187811 point
-
Render events enhancement Having a lot of render events in your resource? Easier attach and remove? Or do you want to pass arguments in to a function which is attached to a render event? Then this might be something for you. Syntax: addRenderEvent bool addRenderEvent(function functionVar [, string eventName, arguments ...]) Arguments: The function you want to attach/target. The event you want to use. ( "onClientRender", "onClientPreRender", "onClientHUDRender") If you do not fill in one of these three, it will automatic fallback to "onClientRender". Fool proof. Arguments you can pass to the target function. (which isn't possible with the default addEventHandler + onClientRender function) Returns: true when added, and false otherwise. Syntax: removeRenderEvent bool removeRenderEvent(function functionVar [, string eventName]) Arguments: The function you want to attach/target. The event you want to use. ( "onClientRender", "onClientPreRender", "onClientHUDRender") If you do not fill in one of these three, it will automatic fallback to "onClientRender". Fool proof. Returns: true if found + removed, and false otherwise. (Not recommended to execute this function every frame > performance) onClientPreRender + timeslice If you use "onClientPreRender", just like the default event, it will pass the timeSlice to the attached/targetted function. https://wiki.multitheftauto.com/wiki/OnClientPreRender I am not sure if attached is the right word for this example, because it isn't really attached to the event. It is saved in a table which gets looped every frame. Performance Is this code bad for performance? The answer to that is NO. I ran a test for it, and it seems that addRenderEvent used less CPU AFTER adding the events. (addRenderEvent: 31% CPU, addEventHandler 99/100% CPU) Adding the event will probably use more CPU, but that is only one execution. Feel free to re-test this example, I am interested how it would perform on your pc's. Performance test code (Not the source code ) Source code:1 point










.thumb.png.856a1564f053eb773929beaa5ce091bc.png)
.thumb.png.30d76d2c14d686b2a50bffec379318a1.png)
