Leaderboard


Popular Content
Showing content with the highest reputation on 27/07/21 in all areas
-
There is another solution that doesn't require render targets, and it's closer to dxDrawImageSection in the way it works: dxDrawMaterialPrimitive. dxDrawImageSection only operates on rectangular sections. dxDrawMaterialPrimitive allows you to draw triangles, specifying the texture coordinates for each vertex, and since triangles can be put together to form other shapes, you can do what dxDrawImageSection does but not limited to rectangular sections. There isn't an example in the wiki page on how to use it, but dxDrawPrimitive has one, and dxDrawMaterialPrimitive works in a similar way, only it takes image as second argument, and each vertex has 5 parameters instead of 3 (2 extra parameters are for image coordinates). I came up with some function, for drawing a radially cut out section of an image. I only tested it as much as I could test it in standalone Lua interpreter so I don't know if it works in MTA, but if it does, someone may put it on useful functions page in wiki ? It uses trianglefan primitive type, puts the first vertex in the center and other vertices around it. local white = tocolor(255, 255, 255, 255) local degToRad = math.pi/180 local function makeVertexAtAngle(centerX, centerY, halfWidth, halfHeight, angle, color) local angleRad = angle*degToRad local xAdd, yAdd = math.sin(angleRad), -math.cos(angleRad) local maxAdd = math.max(math.abs(xAdd), math.abs(yAdd)) xAdd, yAdd = xAdd/maxAdd, yAdd/maxAdd return { centerX+xAdd*halfWidth, centerY+yAdd*halfHeight, color, 0.5+xAdd*0.5, 0.5+yAdd*0.5 } end function dxDrawRadialImageSection(posX, posY, width, height, image, startAngle, stopAngle, color, postGUI) if color == nil then color = white end if postGUI == nil then postGUI = false end local halfWidth, halfHeight = width*0.5, height*0.5 local centerX, centerY = posX+halfWidth, posY+halfHeight local roundedStartAngle = math.floor((startAngle-45)/90+1)*90+45 local roundedStopAngle = math.ceil((stopAngle-45)/90-1)*90+45 local vertices = {{centerX, centerY, color, 0.5, 0.5}} table.insert(vertices, makeVertexAtAngle(centerX, centerY, halfWidth, halfHeight, startAngle, color)) for angle = roundedStartAngle, roundedStopAngle, 90 do table.insert(vertices, makeVertexAtAngle(centerX, centerY, halfWidth, halfHeight, angle, color)) end table.insert(vertices, makeVertexAtAngle(centerX, centerY, halfWidth, halfHeight, stopAngle, color)) dxDrawMaterialPrimitive("trianglefan", image, postGUI, unpack(vertices)) end This example should display a looping 5-second animation of image going from 0 to 360 (if I didn't screw anything up): function drawAnimatedRadialSection() local angle = (getTickCount() % 5000) / 5000 * 360 dxDrawRadialImageSection(100, 100, 200, 200, "your_image.png", 0, angle) end addEventHandler("onClientRender", root, drawAnimatedRadialSection)2 points
-
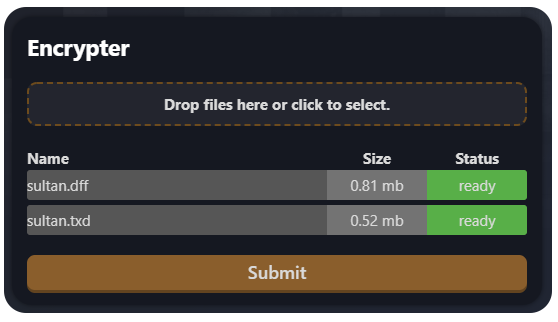
Model encrypter BETA Protect your models easily. https://mtaclub.eu/pcrypt When it's done, don't forget to read HOW_TO_USE.txt! Please let me know if you find a bug!
 1 point
 -
For reference, following the wiki explanation on dxSetBlendMode should fix the quality ("modulate_add" when drawing render target, "add" when drawing to screen) Between these two, I would pick CrystalMV's solution, using a trianglefan for this is neat.1 point
-
A solution is to use render targets and rotating half circles. It might not be less resource intensive than dxDrawCircle though. I hope the illustration makes sense You need 3 rendertargets (RT1, RT2, RT3) which are textures you can draw onto, instead of the screen. Create these once: local W, H = 100, 100 local RT1 = dxCreateRenderTarget(W, H, true) local RT2 = dxCreateRenderTarget(W/2, H, true) local RT3 = dxCreateRenderTarget(W/2, H, true) The main texture which you will eventually draw to the screen, is RT1. RT2 and RT3 will be drawn onto RT1. Split your circle image into two images of a semicircle. Both images need to be full size so they rotate around the center. Do the following "onClientRender" -- Set and clear RT2 dxSetRenderTarget(RT2, true) local RT2_rot = 0 dxDrawImage(0, 0, W, H, "semicircle_left.png", RT2_rot) -- Set and clear RT3 dxSetRenderTarget(RT3, true) local RT3_rot = 0 dxDrawImage(-W/2, 0, W, H, "semicircle_right.png", RT3_rot) -- Set and clear RT1 dxSetRenderTarget(RT1, true) -- Draw rotated circles onto RT1 dxDrawImage(0, 0, W/2, H, RT2) dxDrawImage(W/2, 0, W/2, H, RT3) -- Draw to screen dxSetRenderTarget() dxDrawImage(100, 100, W, H, RT1) Play around with RT2_rot and RT3_rot to make the loading bar work as you want.
1 point